Developing the applist user interface
Yesterday, I introduced a new feature I worked on this week: Famigo Applists. Today, I’ll talk about developing the user interface and backend for creating applists.
Frontend
Creating applists relies on easily finding apps and adding them to the list. Hunting for each app in the Android Market and pasting its URL into a text box is no fun.
I leveraged our database of over 30,000 apps to provide an autocomplete dropdown for the user. Start typing the name of an app, then select it from the dropdown. Nothing could be simpler!
To implement it, I turned to jQuery UI since jQuery is my JavaScript library of choice. Plus, jQuery UI has a built-in autocomplete widget that does everything I need. It’s highly configurable, to boot.
I set it up with a customized list of suggestions, a hook on
selection, and a remote data source (more on that later). Two
functions handle all the customization: autocomplete_render creates
suggestions, and autocomplete_select creates a DOM element when
a suggestion is selected.
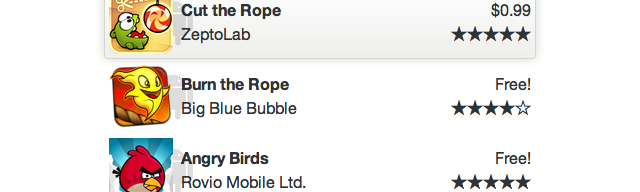
It’s import to create good suggestions in autocomplete_render so
that users can pick an app with confidence. Including the icon, developer,
and platform (Android or iOS) along with the app name should help
the user pick the right app.
function autocomplete_render (ul, item) {
    return $('<li/>')
        .data('item.autocomplete', item)
        .append($('a/>')
            .append($('<img/>')
                .addClass('platform')
                .attr('src', item.platform))
            .append($('<img/>')
                .addClass('icon')
                .attr('src', item.icon))
            .append($('<span/>')
                .addClass('name')
                .html(item.name))
            .append($('<span/>')
                .addClass('developer')
                .html(item.developer)))
        .appendTo(ul);
};

Following the template on the Famigo shared sandbox seemed
like a good idea for creating DOM elements in autocomplete_select.
Each element would have all the same information as the dropdown,
but it would look much prettier.
A couple other small things need to be handled in this function. The element needs to be added to the top of the applist, and the autocomplete box needs to be cleared and re-focused so the user can add another app.
function autocomplete_select (event, ui) {
    $('<li/>')
        .append($('<img/>')
            .addClass('platform')
            .attr('src', ui.item.platform))
        .append($('<img/>')
            .addClass('icon')
            .attr('src', ui.item.icon))
        .append($('<div/>')
            .addClass('name')
            .html(ui.item.name))
        .append($('<div/>')
            .addClass('developer')
            .html(ui.item.developer))
        .hide()
        .prependTo('#list')
        .slideDown();
    $(this).focus().val('');
    return false;
}
All that’s left is enable the autocompletion widget and set it up to use the custom functions.
$('#autocomplete').autocomplete({
    select: autocomplete_select,
    source: '/autocomplete/'
}).data('autocomplete')._renderItem = autocomplete_render;
Backend
The backend just suggests apps based on a search query and returns JSON results. That’s pretty easy. The results are prime candidates for caching, too.
At Famigo, our Django backend is powered by MongoEngine, and we use pysolr for searching. Once Django routes the URL, the view normalizes the query and searches Solr. Then the results are transformed into MongoEngine references, formatted, and returned as JSON.
@cache_page(60 * 60 * 24)
def autocomplete(request):
    query = ' '.join(request.GET.get('term', '').split()).lower()
    results = Solr(SOLR_URL).search(query)
    ids = [result['id'] for result in results]
    apps = Application.objects(id__in=ids).order_by('name')
    return HttpResponse(json.dumps([{
        'developer': app.developer,
        'icon': app.icon,
        'name': app.name,
        'platform': app.platform,
    } for app in apps]), mimetype='application/json')
Notes
I glossed over lots of implementation details that aren’t particularly enlightening. The code presented here isn’t exactly what’s running on our site, but it’s pretty close.
The autocomplete results could be cached on the client side to prevent unnecessary roundtrips for repeated queries, but that’s a lot of extra work for a small benefit. Django returns cached pages pretty quickly.